

Finding the most convenient way to listen to the tunes on your Apple iPod, while in your vehicle can sometimes be a daunting task. Do you lay it beside you on the seat and route the audio through your car stereo using a cassette adapter? Or maybe you use a separate FM transmitter like the iTrip? While both of these methods will work, neither will charge your iPod while it plays music, and neither will securely cradle your iPod in a comfortable viewing angle like DLO's TransPod. Available in Black, White and Silver, this cradle / charger / FM transmitter is compatible with 3rd gen, 4th gen, mini and nano models. 

Hardware Specs
Modulation: FM Stereo
RF Output Frequency Range: 88.1 - 107.9 MHz
Default Preset Frequencies (MHz): 87.9, 94.9, 100.9, and 107.9
Frequency Adjustment: 0.1 MHz per step
Frequency Response: 5Hz ~ 20KHz
Transmitter Power: 1.5 Watts
Transmitter Range: Up to 30 feet (9M)
Input Voltage: 12 - 16 VDC
Input Current: <300mA @ DC12V~16V
Direct Output: 3.5mm Stereo Mini jack
Direct Input: 3.5mm Stereo Mini jack
Storage Temperature: -20° to 120° F (-29° to 45° C)
Operating Temperature: -4° to 113° F (-20° to 45° C)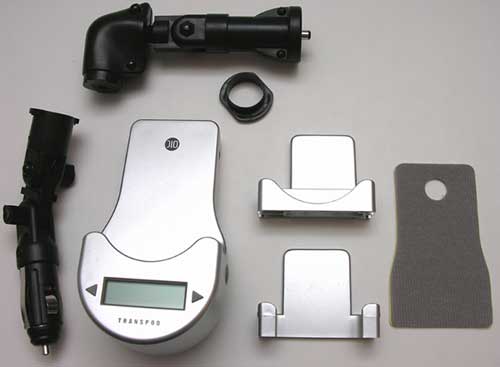
Package Contents
TransPod Cradle
Charger Arm
Extension Arm
iPod mini Insert
iPod nano Insert
Fit Pads (x2)
User Guide
The TransPod is about as plug and play easy as you can get. Depending on the location of your cigarette lighter adapter, you will either plug the charger arm into the pod, or also use the extension arm. Lucky for me, my adapter is located right beside my radio. Both arms are adjustable so that you can customize the viewing angle of your iPod while it is connected to the TransPod.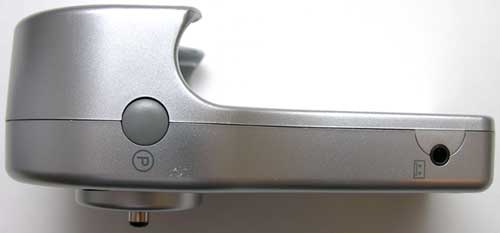
The pod itself is made of plastic and is available in White, Black and Silver. In case you can't tell from the photos, I was sent the Silver version. The front of the Pod has an Indigo Blue backlit LCD display with two arrow buttons on either side. The sole purpose of this display is to show the current FM transmitter frequency. The buttons allow you to adjust that frequency up and down by 1MHz increments. You can access and save up to 4 channel presets by pressing the P button on the right side of the TransPod. Pressing the button quickly will cycle through the saved presets (by default these are: 88.1, 94.9, 100.9, 107.9MHz). Pressing the P button for a few seconds will overwrite the current preset with the currently tuned frequency.
The right side of the TransPod also has a line-out jack (designated with a cassette icon). If for some reason you prefer not to use the built-in FM transmitter in the TransPod to broadcast your tunes through your car stereo, you can connect either to a cassette adapter or to the line-in / auxiliary input jack of your car stereo.
The left side of the TransPod has a backlight toggle button for the LCD display. Pressing the button while the LCD is already lit, will turn the backlight off. Pressing the button when the backlight is off, will toggle it on until you press it again to turn it off. By default, the backlight will stay lit for 2 minutes when you power up the TransPod or whenever you change frequencies.
This side of the TransPod also has a line-in jack so that you can use it with other MP3 players, portable DVD players, game devices etc. You'll need a male-to-male 3.5mm mini cable, which not included, to connect the devices.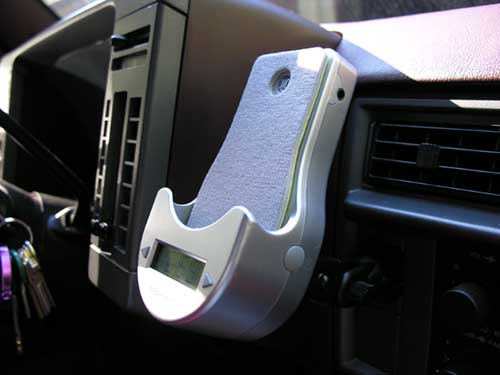
TransPod with fit pad
The great thing about the TransPod is that it is able to accommodate 3rd gen, 4th gen, mini and nano models by using the slide in plastic inserts. Included with the device is an insert for the iPod mini and nano. Without the insert, you can directly plug in 3rd and 4th generation players. With my 40gb 4th gen player, I did have to use the included fit pad. This is a soft padded spacer that keeps the back of the player from rattling against the TransPod when you're driving down a bumpy road. This pad can be permanently attached to the back plate of the TransPod by removing the self adhesive backing. Since I have both a regular sized iPod and a nano, I opted not to attach it. 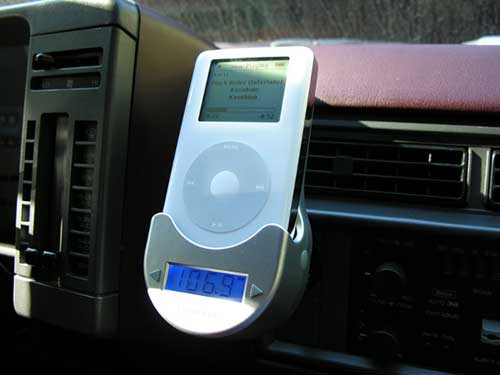
Interacting with the iPod while it is in the TransPod is pretty much no different than any other time. All of the click wheel functions operate as normal. The only difference that you should be aware of has to do with adjusting the volume levels. This is not accomplished by using the click wheel. Instead you use your car stereo to adjust the volume as it is getting the levels through the line-out audio from the bottom of the iPod. You can even turn the volume on the iPod completely off and it will have no effect on the volume that you'll hear through your car stereo's speakers.
TransPod with nano insert
For my nano, I just slid the plastic nano insert into the Pod and then plugged the nano right in. The plastic insert has a snug fit, so that you don't have to hold on to it when you want to remove the nano from the Pod.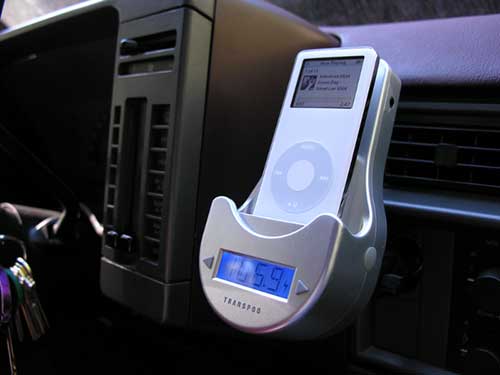
I've never been a real big fan of FM transmitters, because they always seem to either sound flat, or static filled. I was pleasantly surprised by the TransPod. Even using the higher frequencies above 100MHz, the sound was very clear. This beats using a cassette adapter any day. In addition to transmitting your tunes through your car stereo, this product will also charge your iPod's batteries. So, no need to worry about running out of juice for those long car rides.
The TransPod has intelligent power control. This means that it will not drain your car's battery if you leave it plugged into your cigarette lighter while the car is not running. It automatically shuts off the power after 2 minutes of inactivity. Plugging in an iPod automatically powers it back on. If you want to manually power down the TransPod, you can hold down the backlight button on the left side for a few seconds.
I really have enjoyed using the DLO TransPod. $100 may be somewhat pricey, but it seems worth it for wireless plug and play convenience. I'm leaving mine plugged in 24/7.
This article was originally posted to The-Gadgeteer.com


