

 All or most service providers are offering the Motorola V3 for practically free nowadays. What really gets people though is the colors offered. Some offer black, others offer blue, but it seems none offer them "all". This tutorial explains the process to take apart your current V3 and customize it to your liking. For many reasons, the image quality has been reduced. For a PDF version, shoot me an email! All materials can be found at a cell phone parts store - try CNN.CN
WARNING! Before reading any of this tutorial, please make sure to review your phone warranty.
Opening up and/or tampering with stock phones may result in a void of warranty. Use this tutorial at your own discretion, and if for any reason you aren't comfortable with opening up your phone, bring it to the attention of a professional.
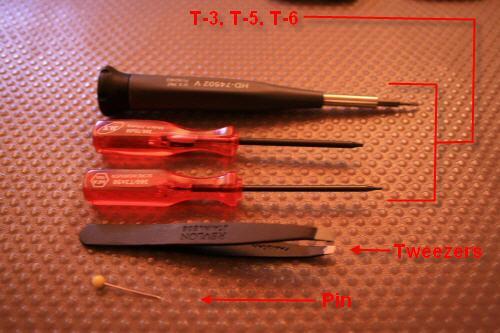
Now to begin, we must start off with the proper tools. Here is a complete list of what I used:

1. Motorola RAZR
2. New OEM Gold Battery Cover
3. Rubber Stopper
4. Keypad
5. New OEM Gold Faceplate
6. Black Mouthpiece
7. New OEM Gold Mouthpiece Bezel
8. Soft Card (Cut Up Gift Card)
9. Two Hinge Nuts and New Gold OEM Motherboard Housing
10. 3 Gold Faceplate Buttons
11. Standard Pin
12. Tweezers
13. T-3 Screw Driver
14. T-5 Screw Driver
15. Assorted T-Size Screw Drivers
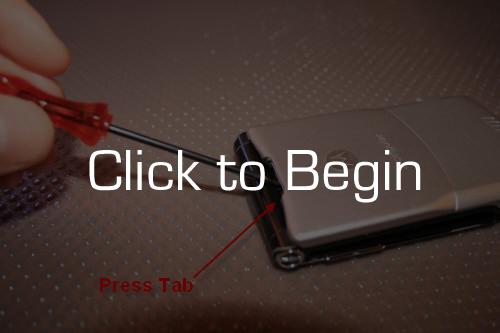
Replacing the housing step-by-step:
...When finished

There you have it. Your brand new housing has been successfully applied. Go ahead and show your friends!
This document is copyright Joseph Ahern 2007. All images and text may not be reproduced and/or redistributed without the consent of the author.
Any questions? Contact me!


